


Umidigi A9 pro screen replacement
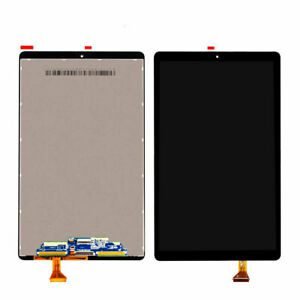
Umidigi A9 Pro Screen Replacement: Get Back to Clarity
- Perfect fit for Umidigi A9 Pro
- High-quality display
- Easy installation
- Affordable fix for a cracked screen
KSh 7,000.00
CompareIntroduction to UMIDIGI A9 Pro
UMIDIGI A9 Pro is a distinguished entrant in the mid-range smartphone market, offering a blend of impressive specifications and affordability. This device boasts a sleek design, enhanced by its 6.3-inch FHD+ display that delivers vibrant colors and sharp images, making it an ideal choice for consumers seeking both style and performance. Powered by the MediaTek Helio P60 processor coupled with up to 8GB of RAM, the UMIDIGI A9 Pro ensures smooth multitasking and an overall efficient user experience.
Further bolstering its appeal, the smartphone comes equipped with a quad-camera setup, headlined by a 48MP main sensor, which allows users to capture high-quality photographs and videos. The device also features a robust 4150mAh battery, providing extended usage time on a single charge. Additionally, the UMIDIGI A9 Pro offers essential modern functionalities such as a fingerprint sensor, face unlock capabilities, and dual SIM support, underscoring its practicality for everyday use.
Despite its well-rounded attributes, one of the common issues UMIDIGI A9 Pro users face is screen damage. Given its expansive display, the screen is susceptible to cracks, scratches, and other forms of damage from accidental drops or impacts. A compromised display can significantly affect the device’s usability, leading to diminished visual quality and responsiveness. In such scenarios, screen replacement emerges as a pragmatic solution to restore the smartphone’s functionality and aesthetic appeal.
Understanding the necessity and process of UMIDIGI A9 Pro screen replacement becomes crucial, especially for users who wish to maintain their device’s performance without resorting to a complete handset replacement. In the subsequent sections, we will delve into the detailed procedure for screen replacement, the tools required, and essential tips to ensure the process is executed efficiently.
Tools and Materials Needed for Screen Replacement
Replacing the screen on your UMIDIGI A9 Pro requires a specific set of tools and materials to ensure the process is smooth and successful. Below is a detailed list of essential items, along with their purposes and where you can procure them.
New Screen: The most crucial component is the replacement screen for your UMIDIGI A9 Pro. It is recommended to purchase an original or high-quality aftermarket screen to guarantee compatibility and performance. Screens can be bought from online retailers, specialized phone parts stores, or directly from the manufacturer’s site.
Precision Screwdrivers: A set of precision screwdrivers, typically ranging from Torx to Phillips head types in various sizes, is essential for removing and securing the tiny screws holding the phone’s components together. These are available in electronic stores or tool kits designed specifically for mobile repair.
Plastic Prying Tools: Plastic prying tools are non-conductive and ideal for safely opening the phone’s casing without causing scratches or damage. They come in various shapes and sizes to help maneuver around the small crevices. These can often be found in mobile repair kits or online.
Tweezers: Fine-tipped tweezers are useful for handling and positioning small components, connectors, and screws with precision. They are frequently included in mobile repair kits but can also be purchased individually from electronics suppliers.
Adhesive: Specialized adhesive will be required to secure the new screen and any components back in place. Adhesives such as Tesa tape or B-7000 adhesive are commonly used and can be found in most electronic repair supply stores.
Heat Gun: A heat gun helps in softening the adhesive bonding the screen to the phone case. This step is critical to avoid cracking or damaging any parts while disassembling the device. Heat guns can be purchased from hardware stores or online marketplaces.
For those looking to make the replacement process even more straightforward, consider optional tools such as an anti-static mat to prevent electrical discharge and a magnifying glass for better visibility of small components.
Step-by-Step Guide to Replacing the Screen
Replacing the screen on your UMIDIGI A9 Pro is a delicate process that requires precision and care. Follow this step-by-step guide to ensure a successful replacement, minimizing the risk of damaging your device. Begin by ensuring that you have all necessary tools, such as a screwdriver, plastic prying tools, tweezers, and a new screen replacement kit.
Prepping the Device and Workspace
First, power off your UMIDIGI A9 Pro and remove the SIM card tray. Working on a clean, flat surface with good lighting will help you keep track of small parts and screws. Ground yourself to prevent static electricity from damaging the internal components of the phone. Use an anti-static wrist strap if available.
Removing the Broken Screen
Start by gently heating the edges of the screen using a hairdryer or heat gun to soften the adhesive. Use plastic prying tools to carefully lift the screen from the frame. Be cautious not to push too hard to avoid cracking the glass further or damaging the internal components. Disconnect the screen’s flex cables with tweezers once the screen is sufficiently lifted.
Installing the New Screen
Align the new screen with the frame, ensuring that the flex cables are properly positioned for reconnection. Connect the new screen’s flex cables to the motherboard, pressing them gently but firmly to ensure a secure connection. Test the new screen by turning on the device before securing it completely. This is to check if the screen is functioning correctly.
Reassembling the Phone
Once confirmed that the new screen is working, reapply adhesive or use the provided adhesive strips from the screen replacement kit to secure the screen to the frame. Press along the edges to ensure a tight seal. Reinsert all screws, the SIM card tray, and any other components you may have removed. Finally, power on your UMIDIGI A9 Pro to ensure everything operates as expected.
Safety Tips and Common Pitfalls
Throughout the process, handle all fragile components with care to avoid damaging connectors and cables. Avoid using metal tools inside the device to prevent short circuits or component damage. Take your time with each step to ensure precision. Common pitfalls include using excessive force, which can damage internal parts, and failing to ground yourself, leading to static discharge and potential device failure.
By following these instructions carefully and paying attention to every detail, you can successfully replace your UMIDIGI A9 Pro screen, extending the life and functionality of your device.
Testing and Final Adjustments
After successfully replacing the screen on your UMIDIGI A9 Pro, it is essential to perform a series of tests and adjustments to ensure the new screen functions correctly. Start by powering on your device. Observe the boot process carefully to check for any display abnormalities, such as incomplete images or color distortions. These could indicate issues with the screen or its connection.
Next, proceed to test the touch sensitivity. Use a diagnostic app or the built-in testing tools to validate touch responsiveness across the entire screen. This ensures that all zones of the display are registering touch inputs accurately. Pay attention to tasks that require multi-touch capabilities to verify that the device can handle multiple contact points simultaneously without errors.
Once touch sensitivity is confirmed, adjust the display settings for optimal performance. Navigate to the device’s setting menu, and fine-tune the brightness, color balance, and resolution. A properly calibrated screen will enhance your viewing experience and help in prolonging the screen’s lifespan by reducing undue strain.
Common post-installation issues may include dead pixels, screen flickering, or unresponsive areas. If any of these issues arise, your first course of action should be to recheck the screen connections. Sometimes, a cable might need reseating or a connector might be loose. If all connections are secure and issues persist, consider seeking professional advice or, if the screen is still under warranty, contacting the manufacturer for a replacement.
To maintain the integrity of the new screen, always use a screen protector and avoid exposing your device to extreme temperatures or physical shocks. Regular cleaning with a microfiber cloth can prevent scratches and keep the display looking new. By following these steps, you can enjoy a fully functional and well-maintained screen on your UMIDIGI A9 Pro. Related products


There are no reviews yet.