


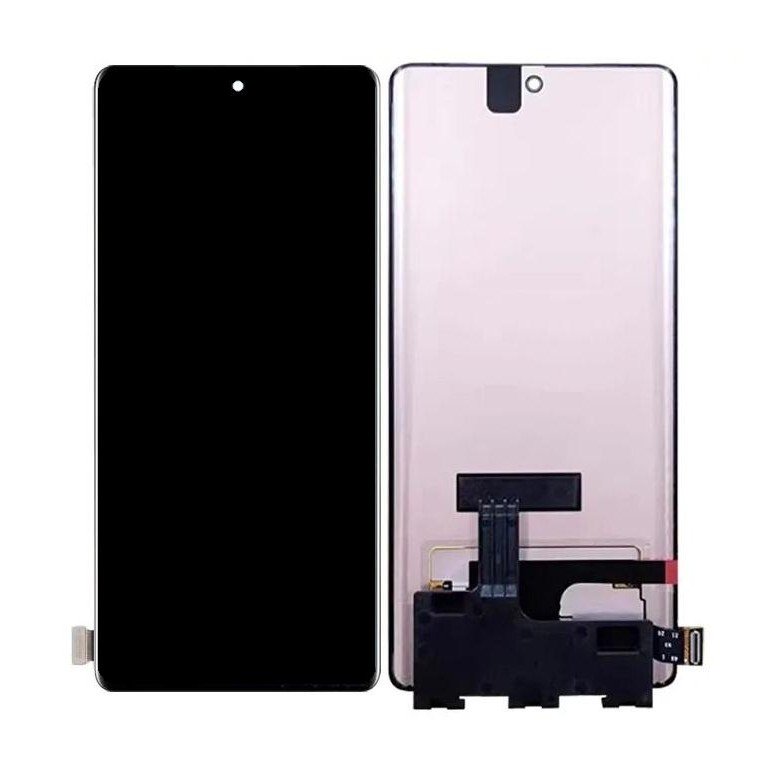
Vivo V30 Screen Replacement
Availability:In Stock!
Vivo V30 Screen Replacement Features
-
Introduction: Understanding the Need for Screen Replacement
In the realm of modern technology, smartphones have become indispensable tools for communication, productivity, and entertainment. The Vivo V30, with its sleek design and high-performance capabilities, is no exception. However, one of the most vulnerable components of any smartphone is its screen. Accidents happen, and one of the most common issues users face is a cracked or shattered screen due to accidental drops or impacts.
A cracked screen is not just a cosmetic issue; it can significantly affect the functionality and usability of the device. For instance, a broken screen can disrupt the touch functionality, making it difficult or impossible to operate the device effectively. In some cases, internal damage resulting from an impact can lead to an unresponsive touch screen, further impairing the device’s performance.
Additionally, the display of the Vivo V30 is crucial for a seamless user experience. Display issues such as dead pixels, discoloration, or screen flickering can compromise the overall quality of visuals, detracting from the enjoyment of media and the clarity of important information. These issues can arise from various sources, including manufacturing defects, prolonged use, or exposure to environmental factors.
Having a fully functional screen is paramount for optimal device performance and user satisfaction. It ensures that users can interact efficiently with their smartphones, whether for professional tasks or personal activities. Therefore, understanding the need for screen replacement and recognizing the symptoms of a failing screen are essential steps in maintaining the longevity and usability of the Vivo V30.
By addressing screen issues promptly, users can avoid further damage and ensure that their device continues to perform at its best. In the following sections, we will provide a comprehensive, step-by-step guide to replacing the Vivo V30 screen, ensuring that users can restore their device to its original functionality and enjoy a seamless user experience.
Tools and Materials Required for Screen Replacement
Replacing the screen of a Vivo V30 necessitates a collection of specific tools and materials to ensure an effective and safe process. First and foremost, a suction cup is essential for lifting the screen without applying undue force, reducing the risk of damage. Complementing this, plastic pry tools facilitate the careful separation of the screen from the device body without causing scratches.
A spudger is another indispensable tool, invaluable for disconnecting the delicate ribbon cables and integrated components. For precision tasks, especially the manipulation of tiny screws and connectors, tweezers are necessary, allowing the handler to access hard-to-reach areas with greater accuracy. In addition, a set of precision screwdrivers is crucial for removing and replacing small screws securely, minimizing the risk of hardware damage.
Regarding materials, a genuine replacement screen for the Vivo V30 is paramount; ensure it is sourced from a reputable supplier to avoid compatibility issues. Adhesive strips are also required for reattaching the new screen firmly to the device body. These strips must be of high quality to maintain durability over time.
An often-overlooked but equally important requirement is a clean, flat workspace. This environment minimizes the chances of dust and debris interfering with the replacement process and ensures that the small components are handled effectively. Ideally, the workspace should also have a soft surface to prevent any accidental scratches or damage to the device during disassembly and reassembly.
Each tool and material outlined here plays a critical role in ensuring the screen replacement process for the Vivo V30 is executed with precision and care. Proper preparation and the right tools can significantly ease the procedure, making it more efficient and reducing the chance of accidental damage.
Step-by-Step Guide to Replacing the Vivo V30 Screen
To begin the process of replacing the Vivo V30 screen, it is vital to prepare your device properly. Start by powering down the Vivo V30 to reduce the risk of electrical damage or short circuits. Additionally, remove the SIM card tray using the SIM ejector tool, ensuring that no components are damaged during the subsequent steps.
Next, proceed with the disassembly of the phone. Use a precision screwdriver to carefully unscrew all visible screws holding the device together. Keep these screws in a safe place, as they are essential for reassembling the phone later. Once the screws are removed, gently use a plastic opening tool or a pry tool to separate the back cover from the phone’s body. Be cautious during this step to avoid snapping the delicate clips holding the casing.
With the back cover removed, locate and disconnect the battery connector to ensure there is no power running through the phone while you work on it. Also, disconnect any additional flex cables or connector ribbons that may obstruct the screen replacement process. Pay close attention to the arrangement of these cables, as they need to be reconnected correctly during reassembly.
To remove the damaged screen, you will need to heat the edges of the screen using a heat gun or hairdryer. This process softens the adhesive securing the screen to the frame. Once sufficiently heated, use the plastic opening tool to gently pry the broken screen away from the phone’s body. Be patient and meticulous to avoid cracking the new screen or damaging other components.
After successfully removing the damaged screen, it is time to install the new one. Place the new screen onto the frame, ensuring it aligns perfectly with the device. Use the adhesive provided with the new screen to secure it in place. Reconnect all the previously removed connectors and flex cables, ensuring they are firmly attached.
Finally, reassemble the device by carefully placing back the screws and the back cover. Replace the SIM card tray and power on the Vivo V30 to test the functionality of the new screen. If installed correctly, the new screen should work seamlessly, restoring your device to its original state.
Following these steps meticulously will ensure a smooth and successful screen replacement for your Vivo V30.
“`html
Post-Replacement: Testing and Troubleshooting
After successfully installing the new screen onto your Vivo V30, the next critical phase involves thorough testing and troubleshooting to ensure its functionality. Begin by booting up your device. Observe the screen as the Vivo logo appears; it should be clear and bright without any flickering or distortion. If the screen does not power on, double-check all cable connections and ensure they are secured correctly.
Once the device is operational, assess touch sensitivity by navigating through different apps and performing various swiping and tapping gestures. Verify that the screen responds accurately to your inputs across all areas, from edge to edge. If any portion is unresponsive, it might suggest a connection issue or a defect in the new screen itself.
Additionally, scrutinize the display clarity. Look for any dead pixels, uneven brightness, or color inconsistencies. Access the settings menu and adjust the brightness levels to check for uniformity. Testing with a variety of backgrounds and images can help identify any anomalies.
Should any problems arise, some troubleshooting steps might include performing a soft reset of the device or reinstalling the screen to ensure all connectors are properly aligned. If the screen still does not function as expected, consulting with a professional or contacting Vivo support for further assistance may be necessary.
To extend the lifespan of your new screen, consider using a high-quality screen protector to shield it from scratches and cracks. Additionally, adopting a sturdy phone case can provide extra protection against accidental drops. Regularly cleaning the screen with a microfiber cloth to prevent buildup of dust and residues can maintain its responsiveness and display quality.
By meticulously testing and troubleshooting immediately after replacement and adhering to proactive maintenance practices, you can ensure that your Vivo V30 continues to deliver optimal performance.
“`
Understanding the Vivo V30 Screen
The Vivo V30 is equipped with a high-performance screen designed to provide users with an exceptional visual experience. The smartphone features a 6.44-inch display, perfectly balancing between usability and immersive viewing. The screen boasts a resolution of 2400 x 1080 pixels, ensuring sharp and vibrant visuals that enhance both media consumption and everyday usage. The Vivo V30 employs an AMOLED panel, a type of display renowned for its superior color accuracy, deep blacks, and energy efficiency. This combination of size, resolution, and technology underlines the importance of maintaining the original screen quality.
Screen issues on the Vivo V30 can significantly impact the overall user experience. One of the most common reasons for screen replacement is physical damage, such as cracks or shattering due to drops or impacts. Even small cracks can escalate, leading to further damage and potential operational issues. Another frequent problem is pixel-related issues, such as dead pixels or discoloration, which can be distracting and diminish the visual quality. Additionally, users may encounter unresponsiveness of the touch screen, which can result from both physical damage and internal defects. An unresponsive screen can hamper the device’s usability, making it crucial to address these problems without delay.
Understanding the specific features and specifications of the Vivo V30 screen is essential before opting for a replacement. Ensuring that a replacement screen matches the original in terms of size, resolution, and display type is necessary to preserve the premium viewing experience that the Vivo V30 is known for. By addressing screen issues promptly, users can continue to enjoy the vibrant and sharp display that sets the Vivo V30 apart, thereby maintaining the device’s overall functionality and aesthetic appeal.
Tools and Materials Needed for Screen Replacement
Performing a successful screen replacement on your Vivo V30 necessitates a precise array of tools and materials. Having the right equipment not only ensures the process goes smoothly but also mitigates the risk of causing additional damage to the device. Here is a comprehensive list of the essential tools and materials you will require:
1. Screwdrivers: A set of specialized screwdrivers, specifically Phillips and Pentalobe screwdrivers, are critical for dismantling the Vivo V30. These screwdrivers should be of high quality and appropriately sized to handle the tiny screws without stripping them.
2. Suction Cup: A suction cup is necessary to separate the screen from the device body gently. This tool helps in lifting the screen without applying excessive force that could crack it further.
3. Plastic Prying Tools: Plastic prying tools or spudgers are essential for loosening the screen and other components inside the Vivo V30. These tools prevent scratching or damaging the internal parts due to their non-metallic nature.
4. Tweezers: Precision tweezers can significantly aid in handling small components and connectors inside the phone, making the replacement process more manageable and precise.
5. Adhesive Strips: High-quality adhesive strips are required to reattach the new screen securely to the phone’s frame. Ensure that the adhesives are compatible with your Vivo V30 for a firm and lasting hold.
6. Replacement Screen: A compatible replacement screen is arguably the most vital material. It is crucial to invest in a high-quality replacement screen to ensure it functions flawlessly and offers the same touch experience as the original.
Investing in high-quality tools and materials cannot be overstated. Substandard tools may cause more harm than good, potentially leading to irreversible damage to the device. Reliable sources for purchasing these materials include specialty electronic repair shops, both online and brick-and-mortar, where you can often find complete toolkits specifically designed for smartphone repairs. Ensure that any tools or replacement screens are explicitly intended for the Vivo V30 to guarantee compatibility and performance.
Step-by-Step Screen Replacement Process
Replacing the screen on your Vivo V30 can appear daunting, but by following these step-by-step instructions, you can accomplish it with confidence. Begin by ensuring your device is powered off to avoid any potential electrical hazards. Press and hold the power button, then select “Power off” from the menu that appears. Once the device is completely off, it’s time to remove the back cover.
Carefully use a plastic opening tool to pry around the edges of the back cover. The back cover is secured with clips, so gentle pressure is required to avoid cracking or bending it. Once the cover is removed, locate the internal screws that hold the mid-frame together. Use a precision screwdriver to remove these screws, placing them in a safe container to avoid losing them.
With the screws removed, gently separate the mid-frame from the front housing. At this stage, you will have access to various components, including the battery and connecting cables. Proceed with caution to avoid disrupting other connectors or circuits. Identify the screen connectors and use a plastic spudger to carefully disconnect them from the motherboard.
Next, use a heat gun or a hair dryer to apply moderate heat around the edges of the screen. This helps to soften the adhesive holding the screen in place. Once heated, use a suction cup to create a gap between the screen and the frame, then insert a plastic card or opening tool to pry it free from the adhesive.
As the old screen is removed, take a moment to clean any residual adhesive from the frame. Apply new adhesive strips or glue, ensuring an even spread to avoid unevenness. Align the new screen with the device, and gently press it into place. Reconnect the screen connectors to the motherboard, ensuring each connection is secure.
Before reassembling the mid-frame and back cover, turn on the Vivo V30 to test the functionality of the new screen. If everything operates correctly, proceed with reattaching the mid-frame using the screws set aside earlier. Finally, snap the back cover back into place, ensuring all clips are securely fastened.
Completing these steps with patience and care will ensure a successful screen replacement for your Vivo V30. Be mindful throughout the process to avoid accidental damage, and you’ll be rewarded with a fully functional, like-new screen.
Testing and Finalizing the Replacement
Once you have successfully installed the new screen on your Vivo V30, it is crucial to reassemble the device properly and conduct a thorough series of tests to ensure everything is functioning as intended. Start by carefully reattaching any internal components you may have disconnected, making sure that all connectors are securely in place. Pay special attention to the ribbon cables and flex connectors, as improper reconnection can lead to malfunctions.
After the internal reassembly is complete, proceed to test the new screen for display quality and touch sensitivity. Power on your Vivo V30 and observe the startup sequence, looking for any abnormalities such as dead pixels, color discrepancies, or screen flickering. Also, navigate through different menus and applications to verify that the touch responsiveness is consistent and precise across the entire display surface.
Another critical aspect to test is the functionality of the front camera and sensors. Access the camera app and switch to the front camera to check for proper image capture and clarity. Additionally, test the proximity sensor by making a call and bringing the device close to your ear; the screen should turn off automatically. Verify the ambient light sensor by observing automatic brightness adjustments under varying light conditions. If any of these components are not functioning correctly, it may necessitate reopening the device to ensure proper reconnection of internal cables.
To finish, reapply the adhesive to secure the new screen effectively. Use a thin layer of high-quality adhesive along the edges of the device frame. Carefully align the screen and press it firmly into place. Ensure that all exterior screws are fastened and that the device’s casing is tightly sealed, leaving no gaps.
Conduct a final comprehensive check by powering on the Vivo V30 once more. Test all essential functions, including making a call, using apps, and verifying the responsiveness of the new screen. This meticulous approach will help ensure that the screen replacement process is successful, providing a seamless experience akin to using a brand-new device.
Introduction to Vivo V30 and Common Screen Issues
The Vivo V30 has emerged as a widely appreciated smartphone, distinguished for its blend of sophisticated design and advanced functionality. Featuring a high-resolution display, powerful processor, and an array of high-caliber cameras, the Vivo V30 offers a premium user experience at a competitive price point. This modern device has gained significant traction among smartphone enthusiasts, who appreciate both its visual appeal and technological prowess.
However, with extensive use, the Vivo V30’s screen may be subject to various issues, which can hinder its optimal performance. One of the most prevalent problems is screen cracks resulting from accidental drops or impacts. Even with the use of protective cases and screen guards, such incidents are not uncommon and can lead to noticeable cracks that detract from the smartphone’s overall functionality and aesthetic.
Another frequent issue encountered by Vivo V30 users is screen scratching. Over time, regular usage may cause minor abrasions on the display surface. Although small scratches might not immediately affect the device’s operability, they can reduce visibility and diminish the viewing experience.
In addition to physical damage, some users report touchscreen malfunctions. These can range from unresponsive areas of the screen to erratic touch inputs, significantly impacting the usability of the smartphone. Such malfunctions can stem from software glitches, prolonged exposure to high temperatures, or physical damage to the internal components of the screen.
Timely screen replacement is paramount to preserving the Vivo V30’s functionality and aesthetic appeal. Addressing screen issues promptly can prevent further damage and ensure that the device continues to perform at its best. Moreover, a well-maintained screen enhances the user experience, allowing for clear display visibility and responsive touch interactions. Understanding and addressing these common screen problems can aid in prolonging the lifespan and ensuring the reliability of the Vivo V30.
Tools and Materials Required for Vivo V30 Screen Replacement
If you are undertaking a Vivo V30 screen replacement, it is critical to have the right tools and materials for the task. The quality of these items directly affects the success of your repair process. Below, we list and describe the essential components needed for a successful screen replacement.
The most obvious component you will need is a replacement screen. Ensure it is designed specifically for the Vivo V30, as incorrect models will not fit properly. High-quality replacement screens can often be sourced from trusted online retailers or specialized repair shops.
A precision screwdriver set is another indispensable tool. These sets usually include various sizes of Phillips, flathead, and Torx screwdrivers needed to remove and reassemble the phone’s screws securely. Opt for a magnetic set to minimize the risk of losing small screws.
Adhesive strips are crucial for securing the new screen to the phone’s frame. High-quality adhesive ensures that the screen remains in place without shifting. The adhesive should be specially formulated for mobile devices, offering both strength and flexibility.
Among the other essential tools, a suction cup is particularly useful. It initially lifts the screen, allowing you to insert plastic prying tools. Plastic prying tools are excellent for gently separating the screen from the frame without causing damage to the delicate components inside the device.
Finally, anti-static gloves are advisable to prevent static electricity discharge, which can potentially damage sensitive components within the phone. These gloves also provide extra grip, reducing the chance of dropping any small parts.
When sourcing these tools and materials, always opt for reputable suppliers to ensure you receive high-quality components. Using substandard materials might lead to further damage or necessitate another replacement soon after. By investing in the right tools and materials, you guarantee not only a successful Vivo V30 screen replacement but also a longer-lasting repair.
Step-by-Step Guide to Replacing the Vivo V30 Screen
Replacing the Vivo V30 screen requires precise steps and attention to detail. Begin by ensuring your safety: power off the phone and remove the SIM card along with any external memory cards. This will prevent any electrical mishaps or data loss during the screen replacement.
Next, gather the required tools which typically include a small Phillips head screwdriver, a plastic pry tool, tweezers, and a suction cup. Once prepared, gently remove the back cover of the Vivo V30 using the plastic pry tool; inserting it between the back cover and the phone’s frame can help to disengage the clips.
Once the back cover is removed, locate and unscrew the screws holding the internal protective panels in place. Carefully set aside these screws, ensuring not to lose them. Next, disengage the battery connector using the plastic tool to avoid any short circuits during the replacement process.
Proceed by disconnecting the various ribbon cables attached to the mainboard. This includes the display connector cable which needs to be carefully detached to free the broken screen. Employ the suction cup to gently lift the broken screen from the frame, applying heat if necessary to soften the adhesive for easier removal.
With the damaged screen removed, you can now position the new Vivo V30 screen. Align it properly within the frame and reattach the connector cables securely. Reconnect the battery and, before completely reassembling the phone, power it on to test the new screen’s functionality. Confirm touch sensitivity and display clarity.
Upon verifying the new screen works correctly, reassemble the phone by reversing the earlier disassembly steps. Ensure that all screws and protective panels are restored into position. Carefully press the back cover into place until it clicks securely.
Troubleshooting tips: If the phone doesn’t power on, double-check all internal connections. For touch sensitivity issues, ensure the screen is properly aligned and free from debris. If all else fails, consulting a professional may be necessary.
Post-Replacement Tips and Best Practices
After successfully replacing the screen on your Vivo V30, it’s pivotal to follow certain best practices to maintain the longevity and functionality of the newly installed component. One of the first tasks is reassembling the phone correctly. Ensure that all screws and clips are securely fastened, as loose parts can affect the performance and durability of your device. Moreover, double-check the alignment of the screen to prevent any additional stress points that could compromise its integrity.
Performing a functionality test is imperative to confirm that the screen replacement was successful. Verify the display for any dead pixels, discoloration, or lag in responsiveness. Test all the touchscreen functions, including the gestures and multi-touch capabilities. This is also the appropriate time to calibrate the touchscreen, if necessary. Calibration ensures that the touch sensitivity is adjusted correctly and that your device responds accurately to your inputs.
To protect your freshly replaced screen from potential damage, it is advisable to use a high-quality tempered glass protector. Tempered glass protectors serve as a robust barrier against scratches, cracks, and even impact damage. Additionally, invest in a durable phone case that offers ample protection without compromising the design and functionality of your Vivo V30. Opt for cases with raised edges to shield the screen from direct impacts when the phone is placed face-down.
Despite meticulous care and attention, sometimes DIY replacements may not go as planned. If you encounter persistent issues such as unresponsive touch, flickering screens, or any other complications, it might be prudent to seek professional help. Expert technicians have the tools and expertise to diagnose and resolve these problems efficiently, often preventing more significant damage or costly repairs in the future.
By following these post-replacement tips and best practices, you can significantly enhance the durability and performance of your Vivo V30’s new screen, ensuring a seamless and effective user experience.
- Quick Installation: Designed for hassle-free replacement to minimize downtime.
- Full Warranty: Comprehensive coverage for any defects or installation issues.
KSh 15,000.00
CompareVivo V30 Screen Replacement
Vivo V30 shattered or cracked screen is an all-too-common occurrence in the life of a smartphone. Whether it’s a result of an accidental drop, a bump against a hard surface, or simply the gradual wear and tear of daily use, a damaged display can significantly impact your phone’s functionality and aesthetic appeal.
For Vivo V30 owners, a cracked or malfunctioning screen can be particularly frustrating. This sleek and stylish phone, known for its vibrant display and immersive viewing experience, loses much of its charm when the screen is compromised. Scrolling through photos, watching videos, or even sending a simple text message becomes a chore when faced with a web of cracks or unresponsive touch controls.
The Solution: A Precision-Engineered Replacement
Fortunately, a damaged screen doesn’t have to spell the end for your Vivo V30. Our meticulously crafted screen replacement offers a comprehensive solution to restore your phone to its former glory.
Key Features:
- Perfect Fit: Our replacement screen is engineered to match the exact specifications of your Vivo V30, ensuring a seamless and secure installation.
- Vibrant Visuals: Experience the same stunning colors, sharp contrasts, and crystal-clear clarity that you enjoyed when your phone was new.
- Responsive Touch: Navigate through apps, type messages, and interact with your phone effortlessly with a fully functional touch screen.
- Durable Construction: Our replacement screen is built to last, using high-quality materials that can withstand the rigors of daily use.
The Benefits of Choosing Our Replacement
- Cost-Effective: Repairing your Vivo V30’s screen is a far more economical option than purchasing a new phone.
- Eco-Friendly: By opting for a screen replacement, you’re contributing to a more sustainable approach to technology consumption.
- Quick and Convenient: Our screen replacement can be installed relatively quickly, minimizing the disruption to your daily routine.
The Path to Restoration
With our Vivo V30 screen replacement, you can say goodbye to the frustration of a damaged display and hello to a revitalized phone.
Rediscover the joy of using your Vivo V30 with a screen that’s as good as new. Immerse yourself in vibrant visuals, enjoy smooth touch controls, and experience the full potential of your phone once again. Don’t let a cracked screen hold you back any longer. Choose our screen replacement and breathe new life into your beloved Vivo V30. Related products


There are no reviews yet.