


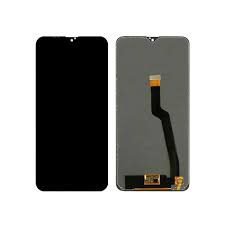
Blackview A52 Pro Screen Replacement: A Comprehensive Guide
- Dual Sim, 3G, 4G, VoLTE, Wi-Fi, NFC
- Helio G99, Octa Core, 2.2 GHz Processor
- 12 GB RAM, 256 GB inbuilt
- 5050 mAh Battery with 66W Fast Charging
- 6.67 inches, 1080 x 2400 px, 120 Hz Display with Punch Hole
- 108 MP + 8 MP + 2 MP Triple Rear & 16 MP Front Camera
- Memory Card (Hybrid), upto 1 TB
- Android v12
Compare
Introduction to Blackview A52 Pro Screen Issues
The Blackview A52 Pro, like many other sophisticated devices, is susceptible to various screen issues that can significantly hinder its functionality. Understanding these common screen issues is crucial for users to make informed decisions regarding screen replacement. Among the most frequent problems encountered are cracks, unresponsive touch, dead pixels, and discoloration.
Cracks usually occur due to accidental drops or external pressure on the screen. Such damage often results in reduced touch sensitivity and can render the display partially or entirely unreadable. Unresponsive touch issues may arise without any visible damage, caused by internal component failures or software glitches, severely impacting the user experience as the touch screen is the primary mode of interaction with the device.
Dead pixels are another common issue where certain areas of the screen fail to display any color, appearing as black spots. These can be particularly annoying and may necessitate a screen replacement if they become widespread. Discoloration, where parts of the screen display incorrect colors or appear faded, can also detract from the overall visual experience and is often a sign of underlying hardware problems.
Before opting for a screen replacement, it’s important for users to assess the extent of the damage and consider the potential risk factors and common causes. Screen damage is frequently attributed to factors such as accidental drops, exposure to extreme temperatures, and prolonged usage leading to wear and tear. Being aware of these aspects can aid in preventive measures and better device management.
Ultimately, understanding the nature of the screen issues and their implications sets the tone for deciding on the necessity of screen replacement. With this foundational knowledge, users are better equipped to determine the best course of action in maintaining the functionality of their Blackview A52 Pro.
Essential Tools and Materials for Screen Replacement
Embarking on the journey to replace the screen of your Blackview A52 Pro requires meticulous preparation and the right set of tools and materials. Ensuring that you have everything on hand before you begin will streamline the process, minimize errors, and ultimately save you time and effort.
First and foremost, a precision screwdriver set is indispensable. These screwdrivers come with various head types suited to the tiny screws in the Blackview A52 Pro. Precision is crucial to avoid damaging the device’s delicate internal components.
Next, a plastic pry tool is essential for safely opening the phone’s casing without causing scratches or other damage. Unlike metal tools, plastic prys exert minimal force on the sensitive parts of your device, ensuring the casing can be opened discreetly.
Alongside the pry tool, a suction cup is used to lift the screen gently once it’s been loosened by the pry tool. This minimizes direct contact with the screen and reduces the risk of applying too much pressure, which could potentially crack or further damage the screen.
Tweezers are another critical tool, ideal for handling small screws and components inside the phone. Precision tweezers allow for accurate placement and removal of these tiny parts without losing or damaging them.
Adhesive strips are essential for resealing the phone once the new screen is in place. These strips ensure a secure fit for the new screen, maintaining the phone’s durability and efficiency. Proper adhesive application is vital for restoring the phone’s integrity and making sure no dust or moisture infiltrates the device.
Lastly, the most crucial item you will need is, undoubtedly, the new replacement screen. It is imperative to acquire a screen tailored specifically for the Blackview A52 Pro to ensure compatibility. Generic screens may not fit correctly or function as intended, leading to further issues down the line.
By gathering these tools and materials — precision screwdrivers, a plastic pry tool, a suction cup, tweezers, adhesive strips, and a new Blackview A52 Pro screen — you can approach the replacement process with confidence and precision. Proper preparation sets the foundation for a successful screen replacement, ensuring your device is restored to full functionality.
Step-by-Step Screen Replacement Process
Replacing the screen on a Blackview A52 Pro can appear daunting, but following a structured approach makes the task manageable. Begin by ensuring the device is powered off to avoid any electrical hazards during the procedure. To do this, press and hold the power button until the screen goes dark. The next step involves removing the back cover, which can be done by gently prying it off with an appropriate tool, typically a plastic spudger to minimize scratching.
Once the back cover is removed, the battery must be disconnected to eliminate any risk of short-circuits or static discharge. Carefully detach the battery connector with the spudger, ensuring you do not apply excessive force. The next step is to unscrew the screws that secure the mid-frame of the phone. Keep these screws safe, as they are small and easy to misplace.
Following this, carefully remove the mid-frame, which exposes the internal components. Disconnect the display connector from the motherboard. To remove the old screen, apply moderate heat using a heat gun or hair dryer set to a low temperature; this loosens the adhesive holding the screen. Gently lift the screen using a suction cup while dislodging any remaining adhesive with the help of plastic pry tools.
Ensure the new screen is compatible with your device before proceeding. Remove any protective films from the new screen and align it precisely with the frame of the Blackview A52 Pro. Gently press around the edges to secure it in place. Reconnect the display connector to the motherboard, and reassemble the mid-frame by screwing it back in place.
Reconnect the battery and replace the back cover, ensuring all clips snap into place securely. Finally, power on the device to verify that the new screen is functioning correctly. If the screen does not respond or displays incorrectly, check the connections for any that may be loose or improperly seated. Handling delicate electronic components with care and attention to detail is critical throughout this process to avoid damaging the device inadvertently.
Post-Replacement Care and Maintenance
Following the installation of your new Blackview A52 Pro screen, adhering to proper post-replacement care practices is essential to ensure both the longevity and optimal performance of the screen. The first step involves thorough testing to confirm the new screen’s functionality. Turn on the device and examine the display for any dead pixels, discoloration, or irregularities. Test the touch responsiveness by navigating through various apps and settings, ensuring the touchscreen accurately registers your inputs.
If the touch screen appears unresponsive or exhibits erratic behavior, recalibration may be necessary. This often involves accessing settings under the display or touch screen section and following the on-screen instructions to recalibrate. Secure reattachment of all internal components is critical; loose connections can result in poor performance or hardware failures. Double-check that all screws are tightened and any adhesive used is adequately set.
To maintain your new screen and avoid future damage, implementing preventative measures is advised. Using a high-quality screen protector can guard against scratches and minor impacts. It’s equally important to avoid exposing your Blackview A52 Pro to extreme temperatures, which can strain the screen and potentially lead to cracking. Clean the screen periodically using a microfiber cloth and a suitable screen cleaner to remove fingerprints and smudges without causing abrasion.
Lastly, be mindful of any warranty or return policies that may apply to your replacement screen. Some manufacturers or vendors provide warranties that cover defects but not accidental damage. Understanding the terms can save you from unexpected expenses should any issues arise. By following these guidelines, you can ensure your Blackview A52 Pro screen remains in excellent condition, providing you with a seamless user experience.


There are no reviews yet.