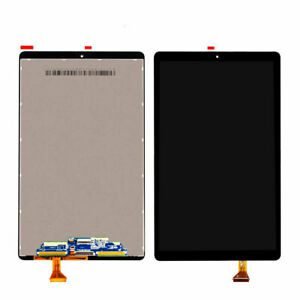
Blackview Wave 6C: Screen Replacements
Blackview Wave 6C key features
-
8MP dual main camera
-
4G network connectivity
-
Up to 1 TB external storage support
-
Android 13 OS
-
HD+ IPS display
-
5MP selfie camera with Face unlock
Compare
Introduction to Blackview Wave 6C Screen Replacement
The Blackview Wave 6C is a popular smartphone known for its robust design and user-friendly features. However, like any electronic device, it is not immune to issues that necessitate screen replacement. Common problems that may lead to the need for a new screen include cracks from accidental drops, unresponsive touch functionality, and various display malfunctions such as flickering or dead pixels.
Understanding when and why a screen replacement is necessary can help users decide the best course of action. Cracks are one of the most obvious issues, easily identifiable and often worsening over time. Other problems might be more subtle but equally disruptive, such as touch screen areas that no longer respond to input or screen sections where the display is consistently distorted or discolored.
The purpose of this guide is to provide a detailed, step-by-step process for replacing the screen on a Blackview Wave 6C. This article will cover the essential safety precautions to ensure the procedure is performed safely and effectively. It will also outline the required tools, which typically include a suction cup, a plastic prying tool, a screwdriver set, and a new screen. Additionally, we will discuss the estimated time required to complete the replacement, enabling users to allocate sufficient time to the task.
Setting clear expectations from the outset, this guide aims to equip readers with the knowledge and confidence needed to handle the screen replacement process on their own. With careful attention to detail and adherence to safety guidelines, replacing the screen on a Blackview Wave 6C can be a manageable task, even for those who may not have extensive technical experience.
Necessary Tools and Preparations
Before embarking on the task of replacing the screen on your Blackview Wave 6C, it is imperative to gather all necessary tools and materials to ensure a smooth and efficient process. The tools required for this procedure include precision screwdrivers, plastic prying tools, tweezers, an anti-static wrist strap, and, most importantly, the replacement screen specifically designed for the Blackview Wave 6C model.
Precision screwdrivers, typically ranging from Phillips to Torx, will aid in the removal of tiny screws without causing damage to the device. Plastic prying tools are essential for gently separating the screen and other components without scratching or breaking them. Tweezers will be handy for handling small screws and components with precision, while an anti-static wrist strap is crucial for preventing any electrostatic discharge that could potentially damage the phone’s internal components.
Once you have procured all the necessary tools, it is prudent to undertake several preparatory steps before commencing the screen replacement. First and foremost, power off your Blackview Wave 6C to avoid any electrical hazards during the repair process. Proceed by removing the SIM card and memory card to prevent any potential data loss or physical damage.
Creating a conducive work environment is equally important. Ensure that your workspace is clean, well-lit, and free from dust and static electricity. A clutter-free area minimizes the risk of misplacing screws or components, and use anti-static mats if possible to further safeguard against static electricity.
Organizing all tools and materials within easy reach will significantly streamline the replacement process. Structure the workspace such that every tool and part has its designated place, thereby reducing downtime and increasing efficiency during the repair. By adhering to these preparatory steps and securing the right tools, you set the stage for a successful screen replacement on your Blackview Wave 6C.
Step-by-Step Screen Replacement Guide
To replace the screen on your Blackview Wave 6C, start by ensuring that your device is powered off to prevent any accidental damage. Place the phone on a clean, flat surface and gather necessary tools, including a precision screwdriver set, plastic opening tools, a suction cup, and a replacement screen.
Step 1: Remove the Back Cover
Using a small suction cup, gently create a gap between the back cover and the phone’s body. Carefully insert a plastic opening tool into the gap and slowly work your way around the edges, prying the back cover off. Make sure to apply even pressure to avoid cracking the cover.
Step 2: Disconnect the Battery
Once the back cover is removed, locate the battery connector. Use a precision screwdriver to remove any screws securing the connector and then carefully use a plastic prying tool to disconnect the battery. This step is crucial for safety and prevents electrical issues during the screen replacement.
Step 3: Detach the Old Screen
With the battery disconnected, find the ribbon cables connecting the old screen to the motherboard. Carefully peel back any protective adhesive covering the connectors, then use a plastic tool to gently unclip and disconnect these cables. Remove any screws from the vicinity holding the screen in place.
Step 4: Remove the Old Screen
Use a hairdryer or heat gun to gently warm the edges of the screen; this softens the adhesive holding it in place. Employ a suction cup to lift the screen slightly, and then insert a plastic tool to continue prying it loose. Take care to not rush, as the screens can be very fragile and prone to breaking. Slowly detach the screen entirely.
Step 5: Install the New Screen
After removing the old screen, clean any remaining adhesive from the frame. Place the new screen into the frame, ensuring it aligns correctly. Connect the ribbon cables back to the motherboard and secure any protective adhesive coverings. Secure the new screen with its screws if applicable.
Step 6: Reconnect the Battery
Carefully reconnect the battery connector by aligning it with its socket and pressing down gently until it clicks into place. Re-screw any securing brackets if required.
Step 7: Reattach the Back Cover
Place the back cover back onto the device, pressing firmly around the edges until it snaps back into place. Ensure all clips are engaged to avoid gaps.
Power on your Blackview Wave 6C to verify that the new screen is functioning correctly. If all appears well, congratulations on successfully replacing your device’s screen!
Reassembly and Final Checks
Upon successfully replacing the screen on your Blackview Wave 6C, the next crucial step involves reassembling the device with caution. Begin by placing the new screen in the correct position. Ensure it is aligned precisely with the connectors. Gently apply slight pressure to secure it, confirming that it fits snugly without gaps.
Next, reconnect the battery to its respective connector. This step is critical, as improper connection may lead to functionality issues. Ensure the battery clicks into place and that there is no movement. Now, carefully attach the back cover, aligning it with the edges of the phone. Gently press down until you hear it click, indicating that it’s securely in place.
When reattaching screws, it is advisable to tighten them evenly and progressively. Over-tightening could damage the screen or the device frame, while insufficient tightening might leave components loose. A good practice is to start with one screw and move diagonally, tightening each screw partway, then going back to fully secure them all.
Before declaring the reassembly process complete, perform a thorough checklist:
- Ensure the new screen is flush with the phone’s body.
- Check that the battery is firmly connected.
- Verify that the back cover is securely attached.
- Confirm all screws are adequately tightened.
Post-reassembly, turn on the device to verify that the new screen is functioning correctly. Navigate through various apps and screens to ensure touch sensitivity and display quality are up to standard. Check all buttons and the speaker to verify they are operating as expected.
If any issues arise, such as the screen not responding or abnormal display performance, revisit the steps to ensure all connections, especially the screen and battery, are secure. Should the problem persist, consider seeking professional assistance to avoid further complications. Completing these steps with precision will help ensure that your Blackview Wave 6C operates optimally post screen replacement.
| Brands |
|---|


There are no reviews yet.