


DIY Guide: How to Replace the OnePlus 3 Screen
Availability:In Stock!
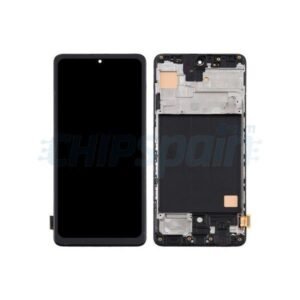
OnePlus 3 Screen Replacement Features: A Quick Look
- Original Optic AMOLED Display: Restore vibrant colors and deep blacks.
- 5.5-inch Full HD Resolution: Enjoy sharp visuals and clear details.
- Gorilla Glass 4 Protection: Enhanced durability against scratches and drops.
- Precise Touch Sensitivity: Maintain smooth and accurate interactions.
- Professional Installation Option: Ensure a flawless fit and optimal performance.
KSh 6,000.00
CompareIntroduction to OnePlus 3 Screen Replacement
OnePlus 3, celebrated for its high-performance features, is not immune to the wear and tear of daily use. Over time, users might encounter common screen issues such as cracks from accidental drops, unresponsive touch functionality, or screen discoloration. These problems can significantly hamper the smartphone’s usability, making it indispensable to consider a screen replacement.
Embarking on a DIY screen replacement project offers several compelling benefits. Foremost among these is cost savings; professional repairs can be expensive due to labor charges and potential markup on parts. Alternatively, procuring a quality replacement screen and dedicating some DIY effort can be a more economical solution. Additionally, the sense of achievement and satisfaction derived from successfully repairing your own device cannot be understated. It empowers users with a deeper understanding of their gadget, subtly enhancing their technological adeptness.
However, taking the DIY route is not without its challenges. The procedure demands a certain level of technical acumen and precision. Mishandling delicate components can lead to further damage, potentially exacerbating the issue. There is also the risk of voiding warranties or encountering complications if the repair is not executed correctly. Proper preparation, including gathering the right tools and following a meticulously detailed guide, can mitigate these risks. Thus, while DIY screen replacement is feasible and rewarding, it is imperative to proceed with caution and realistic expectations.
Gathering the Necessary Tools and Parts
To undertake the replacement of your OnePlus 3 screen, it is essential to gather the appropriate tools and parts ahead of time. This will ensure a smooth and efficient repair process. Below is a comprehensive list of items you will need:
Replacement Screen: The heart of your repair is the replacement screen. Ensure you are purchasing a screen that is specifically designed for the OnePlus 3. It’s paramount to verify the model compatibility to avoid problems during installation. Authentic screens can be sourced from reputable suppliers such as the official OnePlus store or reputable online vendors like iFixit and Amazon.
Screwdrivers: A set of precision screwdrivers is crucial. Typically, a Phillips #00 screwdriver will suffice for the OnePlus 3. Additionally, you might need a Torx T2 or T3 screwdrivers for some internal screws.
Spudgers: Spudgers are indispensable for prying open the phone’s casing without causing damage. Plastic spudgers are recommended to avoid scratching the internal components.
Tweezers: Fine-point tweezers help in manipulating small parts and connectors inside the phone. ESD-safe tweezers are preferable as they help prevent any static damage to the phone’s sensitive components.
Adhesive: Quality adhesive is necessary to secure the new screen in place. Pre-cut adhesive strips made for smartphone screens are available and convenient to use. Alternatively, a tube of B7000 adhesive will also work well.
In addition to these tools, consider including anti-static precautions in your toolkit to avoid damaging the phone’s internal electronics. Anti-static wrist straps or mats can dissipate any static charges that could potentially harm the delicate components.
When verifying the authenticity of parts, pay close attention to the seller’s reputation and user reviews. Look for warranties or guarantees that might be offered with the replacement screen. Counterfeit screens might be cheaper, but they often lead to complications such as reduced resolution, faulty touch responses, or even irreparable damage to the phone.
With the right tools and genuine parts, your OnePlus 3 screen replacement can be performed effectively, restoring your phone to its former glory.
Step-by-Step Screen Replacement Process
The screen replacement process for the OnePlus 3 can be meticulous but is achievable with careful attention to detail. Follow each step methodically to ensure a successful repair.
First, power off the device and remove the SIM card tray. This is done by inserting a SIM eject tool into the small hole beside the tray and gently pulling it out. This step is crucial as it prevents any electrical mishaps during the replacement process.
Next, unscrew the back cover of the phone. There are two T2 Torx screws near the bottom edge of the phone. Using a T2 Torx screwdriver, carefully remove these screws and set them aside. Slowly pry open the back cover using a plastic opening tool. Work the tool around the edges to release the clips holding the cover in place, being cautious not to damage the internal components.
With the back cover off, locate the battery connector and gently disconnect it using a plastic spudger. It is essential to eliminate any power supply to avoid short circuits. Proceed by unscrewing the screws securing the mid-frame and remove it to access the screen connectors.
To remove the old screen, begin by gently heating the edges of the screen using a heat gun or a hairdryer to soften the adhesive. Apply moderate heat and avoid prolonged exposure to prevent damage to the internal parts. Once the adhesive is pliable, use a plastic opening tool to carefully lift the screen from the frame. This may require some patience, as the display is held firmly by adhesive. Disconnect the ribbon cables attached to the screen once it is detached.
For installing the new screen, align it with the frame and reconnect the ribbon cables. Ensure a secure connection for proper functionality. Apply new adhesive strips to the edges of the frame, making sure it adheres evenly. Place the new screen on the adhesive and press down gently across the surface to secure it in place.
Reassemble the phone by reattaching the mid-frame and securing it with the screws removed earlier. Reconnect the battery and position the back cover onto the phone. Secure it by firmly pressing around the edges and replacing the T2 Torx screws at the bottom.
Before sealing the device fully, power it on to test the new screen’s functionality. Confirm touch sensitivity, display clarity, and overall responsiveness. If the screen operates correctly, proceed to secure the back cover completely.
Following these steps should result in a successfully replaced OnePlus 3 screen, restoring your device to its optimal condition.
“`html
Troubleshooting and Final Tips
Screen replacement for the OnePlus 3 can sometimes lead to unexpected issues. One common problem that might arise after replacing the screen is the screen not turning on. This could be due to a loose connection or improper installation. Ensure that all connectors are securely attached, particularly the digitizer and display cables. Recheck these connections before assuming the new screen is faulty.
Another frequent issue is touch functionality problems. If the touch screen is unresponsive or partially responsive, it may indicate that the digitizer cable is not connected properly. Disconnect the battery before reattaching the digitizer cable to avoid short circuits, and reassemble the device carefully. If the touch functionality still doesn’t work, testing the screen on another OnePlus 3 (if available) can confirm or rule out a defective screen.
Gaps between the screen and the frame can also occur and can compromise the device’s functionality and aesthetics. Properly aligning the screen during reinstallation is crucial to avoid gaps. Use double-sided adhesive tape or adhesive strips meant for smartphone repairs to ensure a snug fit. Applying moderate pressure evenly on the screen can help settle it into the frame correctly.
Once the new screen is successfully installed, maintaining its integrity is essential. Investing in a high-quality screen protector can safeguard against scratches and other potential damages. Additionally, using a sturdy phone case can provide added protection against accidental drops and impacts, extending the lifespan of the screen.
Replacing a smartphone screen is a meticulous task that requires patience and attention to detail. Being thorough during each step of the process can prevent many post-repair issues. If, despite following all the guidelines, difficulties persist or if you feel uncomfortable with the procedure, seeking professional assistance is advisable. Many resources, such as tutorials and community forums, are available to offer further support. Related products
“`


There are no reviews yet.