


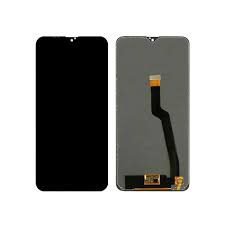
Samsung Galaxy A80: Screen Replacement
Availability:In Stock!
Features
- Dual Sim, 3G, 4G, 5G, VoLTE, Wi-Fi, NFC
- Exynos 1380, Octa Core, 2.4 GHz Processor
- 8 GB RAM, 256 GB inbuilt
- 5000 mAh Battery with 25W Fast Charging
- 6.4 inches, 1080 x 2340 px, 120 Hz Display with Punch Hole
- 50 MP + 12 MP + 5 MP Triple Rear & 32 MP Front Camera
- Memory Card (Hybrid), upto 1 TB
- Android v13
KSh 14,000.00 KSh 17,000.00
“`html
Introduction to Samsung Galaxy A80 Screen Replacement
The Samsung Galaxy A80 is a highly regarded smartphone, known for its innovative rotating camera and bezel-less display. However, despite its advanced technology, the screen is still prone to various types of damage. Common issues necessitating a screen replacement include cracks from accidental drops, dead pixels that disrupt visual clarity, and unresponsive touchscreens that interfere with everyday tasks. Addressing these issues promptly is crucial to maintain both the functionality and aesthetic appeal of the device. Ignoring a damaged screen can lead to more severe problems, such as further cracks spreading, potential water ingress, and additional hardware malfunctions.
When embarking on the journey of screen replacement for the Samsung Galaxy A80, it’s important to have the necessary tools and parts prepared in advance. Essential tools include a precision screwdriver set, a suction cup, plastic prying tools, and adhesive strips. Replacement parts are also vital; you will need a new Samsung Galaxy A80 screen, which can be sourced from various online and offline retailers. Obtaining quality parts and utilizing the correct tools ensures a smoother replacement process and reduces the risk of additional damage to your smartphone.
Replacing a damaged screen not only restores the visual and functional integrity of your Samsung Galaxy A80 but also extends the device’s overall lifespan. By taking this proactive step, you can continue to enjoy the seamless performance and sleek design of your smartphone without interruptions. The investment in time and resources for a screen replacement proves to be worthwhile, offering a rejuvenated device that meets your needs effectively.
“`
Preparing for the Screen Replacement
When it comes to replacing the screen on your Samsung Galaxy A80, thorough preparation is essential to ensure a smooth and successful repair process. Before diving into the hands-on work, you must gather all the necessary tools and materials. The primary tools you’ll need include a replacement screen specifically designed for the Galaxy A80, precision screwdrivers, a set of plastic spudgers, and adhesive strips to reassemble your device. These tools are critical for safely disassembling your phone and securely attaching the new screen.
In addition to having the right tools, it’s also crucial to take safety precautions to protect both yourself and your device. Conduct your work in a clean, well-lit environment, free from any static electricity which can cause further damage to the delicate components within your phone. Wearing an anti-static wristband can help neutralize any static charge before you begin the replacement. Ensure that you have a designated space with all your tools laid out in an orderly manner, minimizing the risk of misplacing small but essential parts.
An often neglected preparation step is data management. Before starting the screen replacement, back up all your important data. This precautionary measure ensures that you don’t lose any valuable information if something goes awry during the repair. Use cloud services or transfer your data to a computer or external storage device for safekeeping.
Lastly, ensure that your Samsung Galaxy A80 is completely powered off. Holding down the power button until the device shuts down can confirm this. Disconnecting the power source minimizes the risk of short circuits during the disassembly and reassembly processes.
Taking the time to meticulously prepare for the screen replacement can significantly enhance your ability to perform the repair efficiently and safely, paving the way for a successful device restoration.
Step-by-Step Screen Replacement Process
Replacing the screen on your Samsung Galaxy A80 requires precision and patience. This step-by-step guide ensures that each process is clearly defined, starting with removing the back cover and battery, and concluding with the successful installation of a new screen. Safety and accuracy are paramount, so it is vital to follow each step diligently.
Removing the Back Cover and Battery
Begin the screen replacement by turning off your Samsung Galaxy A80. Use a hairdryer or heat gun to gently heat the edges of the back cover to help loosen the adhesive. Once heated, employ a plastic opening tool to carefully pry open the back cover, starting from one corner and slowly working your way around the perimeter. Be patient and avoid using excessive force to prevent damaging the cover.
Once the back cover is detached, locate the battery. Use a Phillips screwdriver to remove the screws securing the battery connector. Carefully unplug the battery connector to disconnect power from the device. If your battery is glued, use an adhesive remover or apply more heat to soften and safely extricate it.
Disconnecting Necessary Cables and Components
Next, disconnect all cables and components connected to the motherboard. Start with the ribbon cables by gently lifting the connector tabs and pulling the cables free. Remove any additional screws securing the motherboard in place. Use plastic tweezers to disconnect antenna cables and other connecting pieces. Handle each component delicately to avoid damage.
Removing the Broken Screen
To remove the broken screen, gently heat the edges of the front screen to soften the adhesive. Once sufficiently heated, use a suction cup to create a gap between the screen and the frame. Insert a plastic prying tool into the gap and carefully work your way around the edges to lift the screen off the frame.
Be mindful of the fingerprint sensor ribbon cable, which needs to be detached before fully removing the screen. If the screen is cracked, take necessary safety precautions, such as wearing gloves and using a protective film, to prevent injury from broken glass.
Installing the New Screen
With the old screen removed, wipe the frame clean to remove any lingering adhesive or debris. Prepare the new Samsung Galaxy A80 screen for installation by aligning it with the frame. Gently press the screen into place, ensuring it adheres evenly to the device.
Reconnect the fingerprint sensor ribbon cable, followed by all other cables and components previously detached. Secure the motherboard back in place, and reattach the battery connector. Ensure all screws are tightly fastened and components are correctly aligned.
Finally, place the back cover onto the device. Apply gentle pressure to ensure the adhesive bonds well. Reheat the edges if necessary to reinforce the seal. Once secured, power on your Samsung Galaxy A80 to test the new screen.
If issues arise during the installation, such as unresponsive touch functionality or display anomalies, double-check all cable connections and ensure you’ve removed all protective films from the new screen. These troubleshooting steps are vital for seamless screen replacement.
“`html
Post-Replacement Tips and Troubleshooting
After successfully replacing the screen on your Samsung Galaxy A80, it’s crucial to reassemble the device carefully. Ensure every connector is securely fastened and screws are properly tightened. Gently power on the device to avoid stressing the new screen and observe its initial functionality.
The primary aspect to check is the touch sensitivity across the screen. Ensure that touch functions are responsive and that there are no dead zones. Testing with various applications can help verify that the screen responds accurately in different scenarios. If you notice any areas where the touch is unresponsive, disassemble the device and recheck the connections of the new screen.
Additionally, ensure that all features function as expected. Test the camera, speaker, microphone, and any other components that could have been affected during the screen replacement process. Pay attention to display quality; check for any anomalies such as discoloration, flickering, or dead pixels. These may indicate either an improperly installed screen or a defective replacement part.
In case you encounter persistent touch sensitivity issues, consider recalibrating the touch settings via the device’s settings menu. If display anomalies are evident, an inspection for potential debris between connectors might be necessary, as this can impede functionality.
To prolong the life of your new screen, implementing some maintenance tips is advisable. Utilizing a high-quality screen protector can shield the screen from scratches and minor impacts. Additionally, investing in a durable case offers an added layer of protection against accidental drops. Regularly cleaning the screen with a microfiber cloth also ensures clarity and responsiveness.
Remember, careful handling and ongoing maintenance significantly contribute to the longevity of your newly replaced Samsung Galaxy A80 screen, ensuring that your device remains in optimal condition.
“`


There are no reviews yet.