


Umidigi power screen replacement
Availability:In Stock!
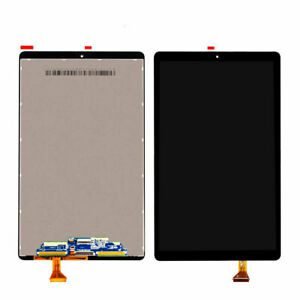
Umidigi Power Screen Replacement: Revitalize Your View
- Perfect fit for Umidigi Power
- High-quality display
- Easy installation
- Affordable fix for a cracked or damaged screen
KSh 4,500.00
Compare
Introduction to UMIDIGI Power Screen Replacement
UMIDIGI Power smartphone is known for its robust features and exceptional battery life, making it a popular choice among users. However, like all smartphones, it is susceptible to screen damage due to various factors. Users often encounter issues such as accidental drops that lead to cracks, or experience unresponsive touch screens that severely impact the device’s usability. When faced with such problems, replacing the screen becomes a necessity to restore the phone to its optimal functionality.
Performing a UMIDIGI Power screen replacement is a delicate task that requires precision and care. The importance of using high-quality replacement parts cannot be overstated. Premium screen replacements ensure compatibility and longevity, preserving the touchscreen’s responsiveness and overall screen clarity. Conversely, using substandard parts may lead to further complications, such as poor display quality or temporary fixes that could fail unexpectedly.
While some users may consider a DIY approach to screen replacement to save on repair costs, it is important to weigh the potential risks. DIY repairs, if not executed properly, can cause additional damage to the smartphone, often resulting in higher repair costs in the long run. Moreover, there are safety concerns associated with handling the delicate internal components of the device, which should be taken into account.
This comprehensive guide aims to provide detailed instructions on how to effectively carry out a UMIDIGI Power screen replacement. Whether you choose to undertake the task yourself or seek professional assistance, understanding each step involved will help you make an informed decision. With the right tools, knowledge, and parts, restoring your UMIDIGI Power to its optimal state is entirely achievable.
“`
Required Tools and Preparing Your Work Area
Embarking on a UMIDIGI Power screen replacement requires a specific set of tools and a well-prepared workspace to ensure a successful and hassle-free process. First and foremost, gather all necessary materials: you will need a replacement screen specifically designed for the UMIDIGI Power, a set of precision screwdrivers, plastic pry tools, tweezers, and adhesive strips. These tools are fundamental to disassembling and reassembling your device without causing additional damage.`
A precision screwdriver set usually includes various Phillips and flathead sizes that are crucial for removing tiny screws found in smartphones. Plastic pry tools help in gently separating components without scratching or breaking delicate parts. Tweezers are essential for handling small screws and components that are difficult to manage with fingers, while adhesive strips will be needed to secure the new screen in place.
Creating an organized and clean workspace cannot be overstated. Choose a flat, well-lit area free of clutter to lay out your tools and components. Using a magnetic project mat can be highly beneficial to avoid losing screws and small parts, as it keeps everything in place and provides a designated spot for each piece during the disassembly. A microfiber cloth is also useful for maintaining the cleanliness of both your workspace and the inside of your device.
Grounding yourself to prevent static discharge is another critical step. Static electricity can damage your phone’s sensitive electronic components. To do this, you could use an anti-static wrist strap or frequently touch a grounded metal object. Alternatively, working on a static-free surface, such as a rubber mat, can also help mitigate the risk.
By gathering the correct tools, organizing your work area, and taking precautions to avoid static discharge, you will set the stage for a smooth and efficient UMIDIGI Power screen replacement. These initial steps are essential for ensuring that your repair process goes as planned, without any unforeseen complications.
Step-by-Step Screen Replacement Process
Replacing the screen of a UMIDIGI Power device requires meticulous attention to detail. The first critical step is to safely power down the device. Hold the power button until the power-off option appears and confirm the shutdown. Removing the SIM card tray is equally essential. Utilizing a SIM ejector tool, press into the small pinhole next to the tray until it pops out. Carefully set the tray and SIM cards aside.
Next, the back cover must be detached. Use a plastic pry tool to gently work around the edges of the back cover, prying it away from the device. Careful handling is crucial to avoid cracking or bending the cover. After removing the back cover, the battery connector must be disconnected. Use a nylon spudger to lift the connector, severing the power supplied to the internal components. This step is vital in preventing short circuits during the replacement process.
The most delicate part of the process follows: removing the damaged screen. Locate and unscrew all screws securing the screen assembly to the motherboard. Using the plastic pry tool once more, carefully separate the damaged screen from the device. It is important to note the presence of adhesive that may be holding the screen in place. Gently work around the edges to release the screen without damaging the internal components or the frame.
Once the old screen is removed, you can proceed to install the new screen. Align the new display with the device frame and gently press it into place. Reconnect the screen connector to the motherboard and securely tighten the screws. Ensure the screen is seated properly to avoid misalignment and functional issues.
Reconnect the battery by reversing the earlier steps and reattach the back cover by snapping it back into place, making sure all edges are secure. Reinsert the SIM card tray and power up the device to test the new screen. If all components are effectively reinstalled, the new screen should function seamlessly, completing the replacement process.
Testing and Final Steps
Upon successfully installing the new screen on your UMIDIGI Power device, the next essential step is to carefully reassemble your phone. Start by reconnecting all internal components that were disconnected during the disassembly process. Ensure that each cable and screw is securely in place to avoid any potential issues. Pay special attention to the screws that hold the new screen assembly, as a loose screw can cause instability or damage the display.
Once reassembly is complete, it’s time to test the new screen to confirm it is functioning correctly. Power on the device and perform a series of basic tests: first, check the display for any irregularities such as dead pixels, discoloration, or flickering. Next, test the touch capabilities by navigating through various apps and menus, ensuring there are no unresponsive touch areas. If you notice any issues, double-check the internal connections to confirm everything is securely in place.
Common problems you might encounter include an unresponsive touch screen or display irregularities. If the screen is unresponsive, it could be due to a loose connection or a defective screen assembly. Display irregularities such as lines or discoloration can also stem from poor connections or damage during installation. If any issues persist, consider consulting a professional or contacting the manufacturer for further assistance.
To prolong the lifespan of your new screen and prevent future damage, consider taking preventive measures. Using a high-quality screen protector can shield the display from scratches and minor impacts. Additionally, avoid exposing your phone to harsh environments, such as extreme temperatures, moisture, and excessive dust, which can deteriorate the screen’s condition over time.
By carefully following these steps and adhering to the recommended precautions, you can ensure that your new UMIDIGI Power screen remains functional and durable, providing you with an optimal user experience. Related products


There are no reviews yet.